How to program STM32F103CB by USB directly (Windows)

Usually, we need a USB to TTL programmer (AKA Serial Programmer) or STLink programmer to program STM32 based boards.
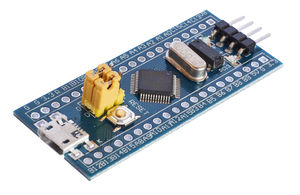
But you can direct program STM32F103CB Blue Pill Board (As shown in above picture) through its built-in micro USB port using a custom bootloader.
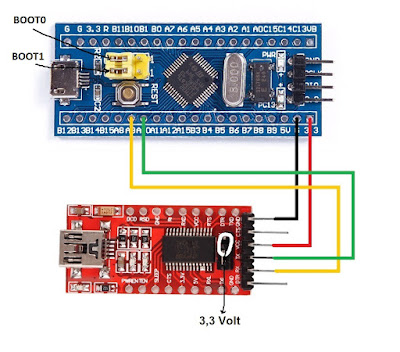
1.Connect the hardware as below. You can use any USB to TTL Converter.
Programmer Device
Tx ————-> A10
Rx ————-> A09
5V ————-> 5V
Gnd ————> GND

2.Set boot pin, BOOT0 to ‘1 position’ (Right most 2 pins)
3.Reset the board using the reset button
4.Download following zip file and extract it.
Download: https://drive.google.com/open?id=1Yav5Q4Md3T2PSPitwuevJqXO-FGWa4wo
5.Goto the extracted directory and run the following command on terminal/command line (Change the COM Port to your available COM Port)
./stm32flash.exe -w ./generic_boot20_pc13.bin COM7

6.After the success message, power off the board and set BOOT0 pin to ‘0 position’ again.
7.Connect USB Mini cable.
8.Open the Arduino IDE and select the board STM32F103C (Watch this video to know how to install STM32 Package: https://www.youtube.com/watch?v=K-jYSysmw9w

9.Now select following settings from Tools menu

10.Select the USB Port which is introduced with name within the brackets.
Ex: ‘COM # (Maple Mini)’
Note
Arduino install directory > hardware > Arduino_STM32 > drivers > win
(Example: C:\Program Files (x86)\Arduino\hardware\Arduino_STM32\drivers\win)
Then run the file named, install_drivers.bat
11.Now you can upload a sketch to the board and get a fun :-)